Are you tired of chipped edges when cutting porcelain tile? Let’s find the perfect blade.
The best wet saw blade for porcelain tile is a diamond blade with a continuous rim. This design helps to reduce chipping and provides a clean, smooth cut. Look for blades specifically labeled for porcelain.

Choosing the right blade can be confusing. Let’s explore what makes porcelain tile so hard to cut and how to get the best results.
Why are Porcelain Tiles Hard to Cut?
Ever wondered why some tiles are a breeze to cut, while porcelain feels like a battle? Here is the answer.
Porcelain tiles are hard to cut because of their density and hardness. They are made from fine clay and fired at high temperatures, making them much more resistant to scratches and cuts than other types of tile.
Let’s get into the details. Understanding the structure of porcelain helps you choose the right tools.
The Density Factor
Porcelain’s density is the main reason it’s hard to cut. Think of it like trying to slice through a very hard stone. Normal ceramic tiles are softer, but porcelain is much more compact. This means it needs a special blade to cut it cleanly
The Firing Process
Porcelain tiles1 are fired at very high temperatures. This makes them incredibly strong and durable2. But this process also makes them harder to cut3. The high heat changes the tile’s structure, making it resistant to regular cutting methods.
The Risk of Chipping
Because porcelain is so hard, it’s easy to chip or crack it while cutting. This is especially true if you don’t use the right blade or cutting technique. Chipping can ruin the look of your project and waste material. I once ruined a whole batch of expensive tiles because I tried to use a regular blade. Now, I always make sure I have the right diamond blade for the job.
| Rasgo | Porcelain Tile | Ceramic Tile |
|---|---|---|
| Densidad | High | Medio |
| Dureza | Very Hard | Hard |
| Firing Temp | High | Lower |
| Chipping Risk | Higher | Lower |
How to Cut a Porcelain Tile without Chipping?
Chipping can ruin a project. What’s the secret to a clean cut?
To cut porcelain tile without chipping, use a wet saw with a continuous rim diamond blade. Ensure the blade is specifically designed for porcelain. Cut slowly and steadily, feeding the tile into the blade without applying too much pressure.

Let’s break down the steps to ensure a clean, chip-free cut every time.
Choosing the Right Blade
The blade is the most important part. You need a diamond blade with a continuous rim. This type of blade has a smooth, unbroken edge that reduces chipping. Make sure the blade is specifically for porcelain. These blades are designed to handle the hardness of porcelain without causing damage.
Using a Wet Saw
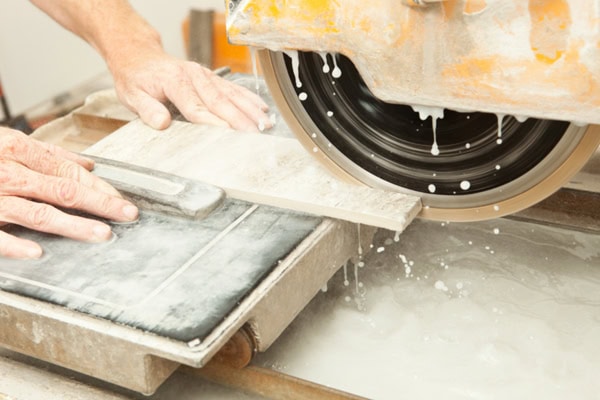
A wet saw is essential. The water cools the blade and tile, reducing friction and heat. This helps prevent chipping and cracking. Always make sure the water reservoir is full before you start cutting.
Cutting Technique
Cut slowly and steadily. Don’t rush. Let the blade do the work. If you push too hard, you risk chipping the tile4. Feed the tile into the blade gently, keeping a firm grip5. I like to use a guide to keep the cut straight and even.
Additional Tips
- Mark the Tile: Use a tile marker to clearly mark where you want to cut.
- Practice: If you’re new to cutting porcelain, practice on a scrap piece first.
- Safety Gear: Always wear safety glasses and gloves.
| Step | Action | Reason |
|---|---|---|
| 1. Choose Blade | Continuous rim diamond blade for porcelain | Reduces chipping, designed for porcelain’s hardness |
| 2. Use Wet Saw | Keep blade and tile cool | Prevents overheating, reduces friction, minimizes cracking |
| 3. Cut Slowly | Gentle, steady pressure | Avoids stress on the tile, ensures a clean and precise cut |
Do you Cut Porcelain Tile Face Up or Down?
Face up or face down? Does it even matter?
When cutting porcelain tile with a wet saw, it’s generally best to cut with the face up. This allows you to see the cut line clearly and helps to minimize chipping on the finished surface.

Let’s explore why face-up cutting is usually better, but also consider situations where face-down might work.
Why Face Up is Preferred
Cutting face up lets you see exactly where the blade is going. This is important for making accurate cuts6. You can follow your marked line closely and make adjustments as needed. Also, cutting face up7 often results in less chipping on the visible surface of the tile.
Situations for Face Down
Some people prefer cutting face down, especially if they are worried about scratching the surface of the tile on the saw’s tray. If you choose to cut face down, make sure the tile is well-supported to prevent it from moving during the cut.
My Personal Experience
I usually cut face up because I find it easier to control the cut and see the line. However, if I’m working with very delicate or polished tiles, I might try face down with extra support to protect the finish. It really depends on the specific tile and the type of cut I’m making.
| Cutting Direction | Pros | Cons |
|---|---|---|
| Face Up | Better visibility of cut line, less chipping on visible surface | Potential for scratching the tile on the saw’s tray |
| Face Down | Protects tile surface from scratches | Harder to see the cut line, may increase chipping on the visible side |
What to Use to Mark Porcelain Tile?
Accurate marks are key to accurate cuts. But what should you use?
To mark porcelain tile, use a tile marker or a grease pencil. These tools create visible lines that won’t scratch the tile. Avoid using permanent markers, as they can be difficult to remove.

Let’s explore the best options for marking your tile and how to ensure your marks are accurate and easy to see.
Tile Markers
Tile markers are specifically designed for marking tile. They have a fine tip that creates a clear, precise line. The ink is usually waterproof and won’t smudge easily. Tile markers are available at most hardware stores.
Grease Pencils
Grease pencils are another good option. They create a thick, visible line8 that is easy to see on both light and dark tiles. Grease pencils are also waterproof9 and won’t scratch the tile.
Avoid Permanent Markers
Avoid using permanent markers. While they create a dark, visible line, they can be difficult to remove if you make a mistake. Permanent markers can also bleed into the tile, leaving a permanent stain.
My Method
I usually use a tile marker for precise cuts and a grease pencil for quick marks. I always clean the tile with a damp cloth before marking to ensure the marker adheres properly. And I always double-check my measurements before cutting.
| Marker Type | Pros | Cons |
|---|---|---|
| Tile Marker | Precise lines, waterproof | Can be harder to see on dark tiles |
| Grease Pencil | Visible on all tiles, waterproof | Lines are thicker, less precise than tile markers |
| Permanent Marker | Dark, visible lines | Difficult to remove, can stain the tile |
Conclusión
Choosing the right blade and using the correct techniques will make cutting porcelain tile much easier. A continuous rim diamond blade, a wet saw, and careful cutting are your best friends.
-
Explore the advantages of porcelain tiles, including their strength and durability, which make them ideal for various applications. ↩
-
Learn about the unique properties of porcelain tiles that contribute to their strength and durability, making them a top choice for flooring. ↩
-
Understand the difficulties associated with cutting porcelain tiles and discover the best tools and techniques for the job. ↩
-
This link will help you understand the common mistakes to avoid when cutting tiles, ensuring a smooth finish. ↩
-
Discover the significance of maintaining a firm grip during tile cutting to enhance safety and accuracy. ↩
-
This resource will provide you with techniques and tips for achieving precision in your tile cuts, ensuring a professional finish. ↩
-
Explore this link to understand how cutting face up can enhance accuracy and reduce chipping in your tile projects. ↩
-
Discover the significance of having a visible line during tile installation for precision and accuracy in your work. ↩
-
Learn how waterproof grease pencils perform on various surfaces, ensuring durability and effectiveness in your marking tasks. ↩