When SDS hammer drill bits jam in concrete, jobs stop, costs rise, and confidence drops. Preventing stuck bits protects tools—and your reputation. So, what actually causes stuck drill bits, and how do top suppliers help B2B buyers avoid these costly problems?
Drill bits get stuck in reinforced concrete mainly because of hitting rebar or debris jamming the flutes. The right removal techniques and specialized drill bit designs prevent tool breakage, downtime, and after-sales headaches.

Tool buyers and resellers want solutions beyond the drill itself. The right article lets you educate your customers, support your after-sales team, and show your technical depth as a supplier. I’ve learned the best B2B approach starts with understanding the root problem, then delivering a product and knowledge fix in one place.
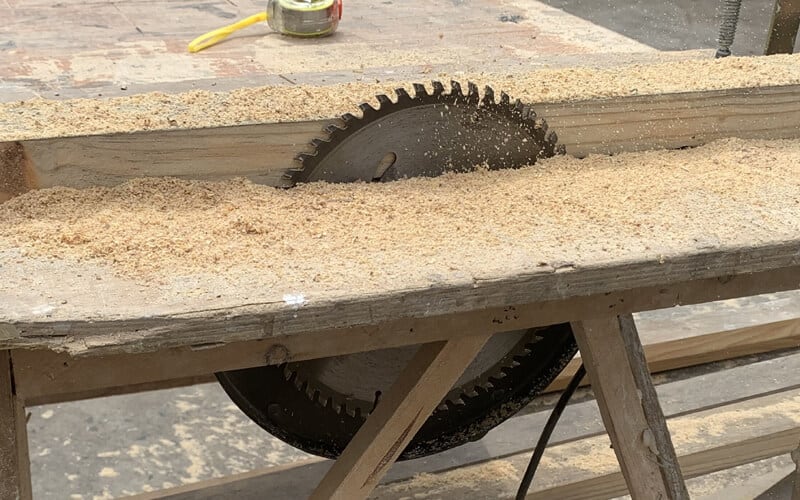
Why Do Hammer Drill Bits Get Stuck? (The Physics)
Stuck SDS bits usually mean rebar strike or packed dust. Poor design or the wrong bit causes both.
When a slim 2-cutter bit hits rebar, it jams or chips, stopping work. Packed dust from shallow flutes traps bits too. Using the right head and flute design helps you break through safely.

In real jobs, I see 2-cutter bits seized by rebar, while 4-cutter, cross-head tips cut right through. Shallow, narrow flutes collect grit and compact it, trapping the bit. That’s why Tenyu engineers each model for smooth chip ejection and rebar resistance. This detail matters for procurement—and fewer returns.
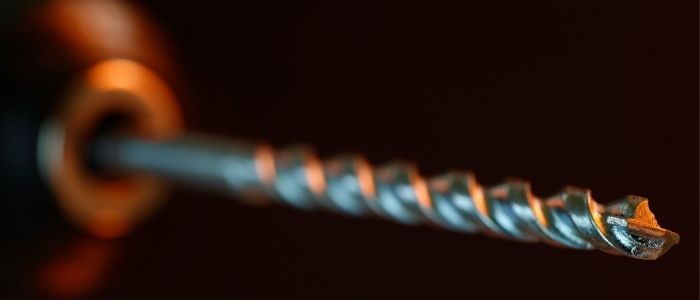
The Tenyu Product Difference: Preventing Hammer Drill Bits Jamming
Tired of bits getting stuck in rebar? The best way to remove a stuck bit is to use one that doesn’t jam. Check out Tenyu’s Cross-Head (4-Cutter) SDS Max Drill Bits. Designed with active centering tips to cut through rebar without seizing.

The 4-cutter tip design means four symmetrical cutting edges share the load as they meet rebar. Instead of catching, the tip shears cleanly through metal, while deeper, spiral flutes keep dust moving out. For procurement, this means fewer complaints, better job-site reviews, and support for your brand reputation.
Step-by-Step: How to Safely Remove a Stuck SDS Bit
When the bit jams, safe removal is the top priority. These proven methods put safety and tool protection first—and can be shared directly with your customers as an after-sales guide.
Method 1: The Vice Grip Technique
Always unplug electric tools or remove batteries before touching stuck bits. This step prevents injury and motor damage.
Attach locking grips (vice grips) securely to the exposed end of the bit. Rock the grips slowly back and forth, keeping the tool braced. Do not force or twist hard. Most minor jams will loosen this way.

This technique works best immediately after a jam before dust or heat can harden around the shank.
Method 2: Reverse Rotation (Use with Caution)
Some rotary hammers have a manual reverse. Use only if the bit is just starting to seize, not if it is deeply embedded.
Briefly trigger reverse with gentle pressure. Do not force. This can unstick bits from light rebar touches or compacted debris.

Safety Warning: Never use reverse if the bit is deeply jammed or if resistance is high—it could damage the chuck or gear set.
Method 3: The "Rescue" Bit (Advanced)
Professionals avoid excessive pulling or hammering, which can destroy the tool, bit, or even the workpiece. Instead, drill a small relief hole next tothe stuck bit to reduce pressure.
With a new bit, drill a 10–12 mm hole parallel to and next to the jammed bit. This relieves stress, lets you break concrete free, and gently extract the stuck bit.

This advanced technique shows your customers real engineering knowledge, not just basic tips.
Safety Warning: Always avoid excessive hammering or twisting on the tool. Damaging the chuck can void warranties and increase after-sales costs.
B2B Value: Why Product Design Prevents Problems
Buyers, wholesalers, and importers do not want repeated after-sales complaints about stuck bits—they want to avoid the issue from the start. This is why Tenyu builds anti-jam features into every SDS Plus and SDS Max bit, using wide spiral flutes and tested tip geometries. These points aren’t just for marketing; they save your brand on warranty costs and keep dealers loyal.
Maintenance Tips for Distributors
Distributors, give real value by putting this checklist in your customer’s order—or print it on your box.
| Pointe | Why It Matters |
|---|---|
| Discard bits with chipped tips or twisted shanks | They cause jamming and reduce drill life |
| Clean SDS slots after every use | Prevents build-up that causes sticking and hard insertion |
| Lubricate bit ends & chuck monthly | Reduces friction, easier bit release |
| Train staff to stop if “bounce” or excess vibration occurs | Early warnings of stuck bits, prevent damage |
After teaching my own staff these points, our complaint rate dropped, and repeat sales grew.
FAQ for Resellers
Q1: How do I explain when a bit should be replaced to my customer?
A1: If you see tip cracks, lost carbide, bent shank, or bits that jam on insertion, replace and upsell a high-end model.
Q2: How should I tell customers to clean out SDS slots?
A2: Use a stiff nylon brush or compressed air after drilling. Avoid water, which can rust the fitting.
Q3: Can I use this article to support my after-sales team?
A3: Yes! Share or print these steps. Your end users will see you offer real solutions, not just products.
Want reliable SDS bits that never jam in rebar? Contact Tenyu now for samples, technical details, and full OEM/ODM support for your wholesale business!


Conclusion
You solve stuck SDS bits with knowledge, smart prevention, and the right product design. That’s how you ensure smoother sales, fewer claims, and a reputation for true support in every order.