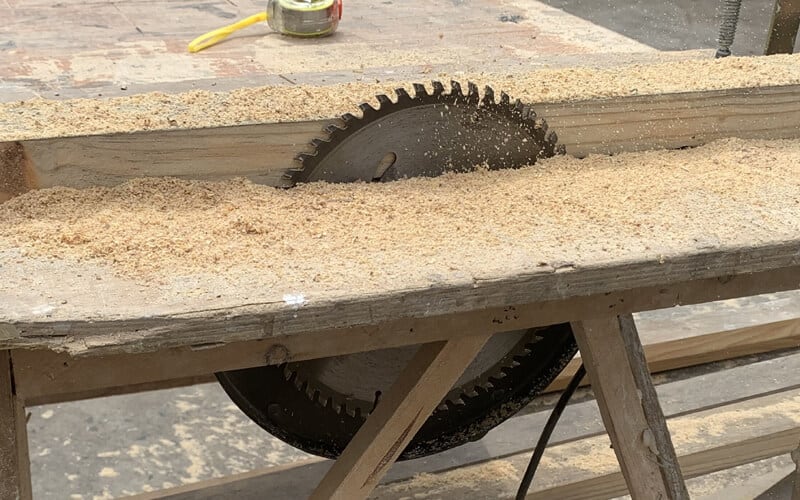
Worried about using the wrong drill bit and ruining your project? I know the feeling! It’s like trying to open a can with a spoon – frustrating and messy.
High-speed steel (HSS) drill bits are mainly used for drilling into softer materials like wood, plastic, and softer metals such as aluminum, copper, and mild steel. They are a cost-effective and versatile option for various home and professional projects.

Ready to learn more about when to use HSS drill bits and how to get the best results? Keep reading!
What Speed for Drilling Stainless Steel?
Ever tried drilling stainless steel and ended up with a drill bit1 and a frustrated sigh2? I’ve been there. It’s like trying to cut butter with a dull knife – messy and ineffective.
When drilling stainless steel, it’s important to use a slow speed to prevent overheating the material and hardening it. A general starting point is between 100 to 300 RPM, depending on the diameter of the drill bit.

Mastering Speed for Stainless Steel
Choosing the right speed is crucial, but it’s not the only factor. Overheating can quickly ruin your drill bit and make the stainless steel harder to drill. Here’s a breakdown of why speed matters and how to manage it:
- Why Slow Speed? Stainless steel has a tendency to work harden when it gets too hot. Work hardening means the metal becomes harder and more brittle, making it even more difficult to drill through. Using a slow speed minimizes heat buildup.
- Coolant is Key: Always use a cutting fluid or lubricant when drilling stainless steel. This helps to dissipate heat and reduce friction between the drill bit and the material. WD-40 or even motor oil can work in a pinch, but specialized cutting oils are best.
- Consistent Pressure: Apply steady and even pressure. Too much pressure can cause the bit to overheat or break, while too little pressure can cause work hardening. Let the drill bit do the work, and don’t force it.
- Pilot Hole: Starting with a pilot hole can help guide the larger drill bit and reduce the amount of friction and heat generated.
- Take Breaks: If you’re drilling a lot of holes, take breaks to allow the drill bit and the material to cool down. This prevents overheating and extends the life of your drill bit.
| Factor | Details |
|---|---|
| Drilling Speed | Start with 100-300 RPM, adjust based on drill bit size. |
| Coolant | Use cutting fluid to reduce heat and friction. |
| Pressure | Apply steady, even pressure; avoid excessive force. |
| Pilot Hole | Use a pilot hole to guide the larger drill bit. |
| Breaks | Take breaks to cool down the drill bit and material. |
By paying attention to these details, I’ve found that drilling through stainless steel becomes much more manageable, resulting in cleaner holes and longer-lasting drill bits.
What is DIN 338 Standard?
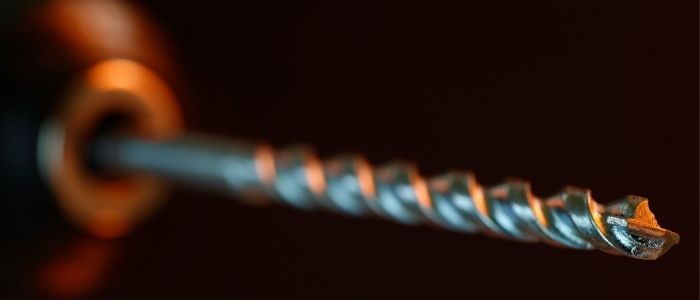
Ever wondered what those numbers and letters on your drill bits mean? I used to just grab any drill bit, but I quickly learned that understanding standards can make a huge difference.
DIN 338 is a German standard that specifies the dimensions and characteristics of twist drill bits, ensuring quality and consistency. It covers aspects like the drill bit’s length, flute length, diameter, helix angle, point angle, material, and coating.

Decoding the DIN 338 Standard
The DIN 338 standard is like a blueprint for drill bit manufacturers, ensuring that the drill bits meet specific performance requirements. Here’s a more detailed look:
- Key Dimensions: The standard defines precise measurements for the overall length, flute length (the spiral part that removes material), and the diameter of the drill bit. These dimensions ensure the drill bit fits properly in your drill and performs as expected.
- Drill Bit Types: DIN 338 mainly covers parallel shank twist drills, which have a consistent diameter along the shank and cutting portion. These are the most common type of drill bits you’ll find.
- Helix Angle: The helix angle of the flutes affects how the drill bit cuts and the type of material it’s best suited for. DIN 338 specifies different helix angles for various applications:
- Type N: Normal helix, ideal for general-purpose drilling in materials like steel and iron.
- Type W: Higher helix angle, better for softer materials like aluminum and plastics.
- Type H: Lower helix angle, designed for harder materials like stainless steel and cast iron.
- Point Angle: The angle of the drill bit tip, typically around 118 degrees for general-purpose bits, is also defined by the standard. This angle can vary depending on the specific material and application.
- Material and Coating: DIN 338 specifies the materials the drill bits can be made from, such as high-speed steel (HSS), and may also cover surface coatings like black oxide or titanium nitride (TiN), which enhance durability and performance.
| Aspect | Details |
|---|---|
| Dimensions | Specifies overall length, flute length, and diameter. |
| Drill Bit Type | Covers parallel shank twist drills. |
| Helix Angle | Defines angles for different materials (Type N, W, H). |
| Point Angle | Specifies the angle of the drill bit tip (typically 118 degrees). |
| Material/Coating | Specifies materials like HSS and coatings like black oxide or titanium nitride. |
Understanding DIN 338 helps me choose the right drill bit for the job, ensuring better results and longer tool life.
What is the Difference Between ASTM and DIN Standards?
Struggling to understand the difference between ASTM and DIN standards? I used to find it confusing, but knowing the basics can really help when choosing materials and tools.
The main difference between ASTM and DIN standards lies in their origins and focus. ASTM (American Society for Testing and Materials) is U.S.-based and focuses on testing methods and material quality, while DIN (Deutsches Institut für Normung) is German and emphasizes technical specifications and dimensional accuracy.
ASTM vs. DIN: A Detailed Comparison
Both ASTM and DIN standards3 are crucial in manufacturing, but they serve different purposes and are used in different contexts. Here’s a more detailed comparison:
- Origin and Application:
- ASTM: Developed in the U.S., ASTM standards are widely used in North America and cover various industries, including metals, plastics, construction, and environmental science. They focus on material testing and quality control.
- DIN: Developed in Germany, DIN standards are prevalent in Europe, especially in German-speaking countries. They are widely used in machinery manufacturing, automotive, and construction engineering, focusing on technical specifications and dimensional accuracy.
- Units of Measurement:
- ASTM: Uses inches and pounds, aligning with the U.S. market.
- DIN: Uses metric units (mm, kg), catering to the European market.
- Focus and Detail:
- ASTM: Emphasizes testing methodologies and criteria. For example, ASTM E8/E8M details tensile testing methods for metals.
- DIN: Offers broader guidelines for a wider range of materials, often providing a more versatile framework, with a focus on precision and technical excellence.
- Quality Requirements:
- ASTM: Strict quality inspection requirements covering chemical composition, mechanical properties, and non-destructive testing. Suitable for applications in extreme conditions like high temperature and pressure.
- DIN: Strict quality requirements, particularly focusing on mechanical properties, dimensional accuracy, and chemical composition. Ideal for industries requiring high precision, such as automotive manufacturing.
| Feature | ASTM (American Society for Testing and Materials) | DIN (Deutsches Institut für Normung) |
|---|---|---|
| Origin | United States | Germany |
| Focus | Testing methods, material quality | Technical specifications, dimensional accuracy |
| Units | Inches and pounds | Metric (mm, kg) |
| Application | Various industries, especially in North America | Machinery, automotive, construction, especially in Europe |
| Key Characteristic | Detailed testing procedures, quality control | Broad guidelines, emphasis on precision |
Understanding these differences helps me choose the right standards based on the project’s requirements, target market, and specific application.
What is the Best Way to Drill Through Stainless Steel?
Is drilling through stainless steel giving you a headache? I get it. It can be tough, but with the right approach, it’s totally doable.
The best way to drill through stainless steel involves using the right drill bit, applying low speed and high pressure, using lubrication, and keeping the drill bit and material cool. This prevents work hardening and extends the life of your drill bits.

Drilling Stainless Steel: A Step-by-Step Guide
Drilling stainless steel requires a different approach than drilling softer materials4. Here’s a detailed guide to help you get it right:
- Choose the Right Drill Bit: Opt for cobalt drill bits or high-speed steel (HSS) bits with a titanium coating. These are designed to withstand the heat and hardness of stainless steel.
- Low Speed, High Pressure: Stainless steel requires a slower drilling speed to prevent overheating. Start with around 100-300 RPM, depending on the drill bit size. Apply firm, steady pressure to allow the bit to cut through the material, rather than just rubbing against it.
- Lubrication is Essential: Use a cutting oil or lubricating paste to reduce friction and heat. Apply it generously to the drill bit and the hole to keep everything cool.
- Start with a Pilot Hole: Use a center punch to create a small indentation, then drill a pilot hole. This helps guide the larger drill bit and prevents it from wandering.
- Keep it Cool: Stainless steel work hardens quickly when heated, making it even harder to drill. Take breaks to allow the drill bit and material to cool down. Reapply lubricant frequently.
- Steady Pressure: Maintain consistent downward pressure. Too much force can cause the drill bit to slip or break, while too little pressure can lead to inefficient drilling and work hardening.
| Step | Details |
|---|---|
| Drill Bit | Use cobalt or titanium-coated HSS drill bits. |
| Speed/Pressure | Low speed (100-300 RPM), steady and firm pressure. |
| Lubrication | Apply cutting oil or lubricating paste generously. |
| Pilot Hole | Start with a center punch and pilot hole. |
| Cooling | Take breaks to cool down the drill bit and material. |
| Pressure Control | Maintain consistent downward pressure; avoid too much or too little force. |
By following these steps, I’ve found that drilling through stainless steel becomes much more manageable, resulting in cleaner holes and less wear on my drill bits.
You Can Send Us Your Request


Conclusion
So, HSS drill bits are your go-to for softer stuff, but remember the right speed and technique for tougher materials like stainless steel!
Looking for high-quality din338 drill bits that deliver performance and durability? At TENYU TOOL, we specialize in manufacturing premium tools trusted by professionals worldwide.
-
Learn how to maintain your drill bits and keep them sharp for efficient drilling. ↩
-
Understanding common frustrations can help you find solutions and improve your drilling experience. ↩
-
DIN standards play a vital role in ensuring consistency and reliability in manufacturing. Discover more about their importance here. ↩
-
Understanding the differences in drilling techniques can enhance your skills and improve your results when working with various materials. ↩